Crafting Connected ESP32 Hello Kitty Lights: A DIY Anniversary Gift

Used materials
Let me start by listing the materials I used for this project:
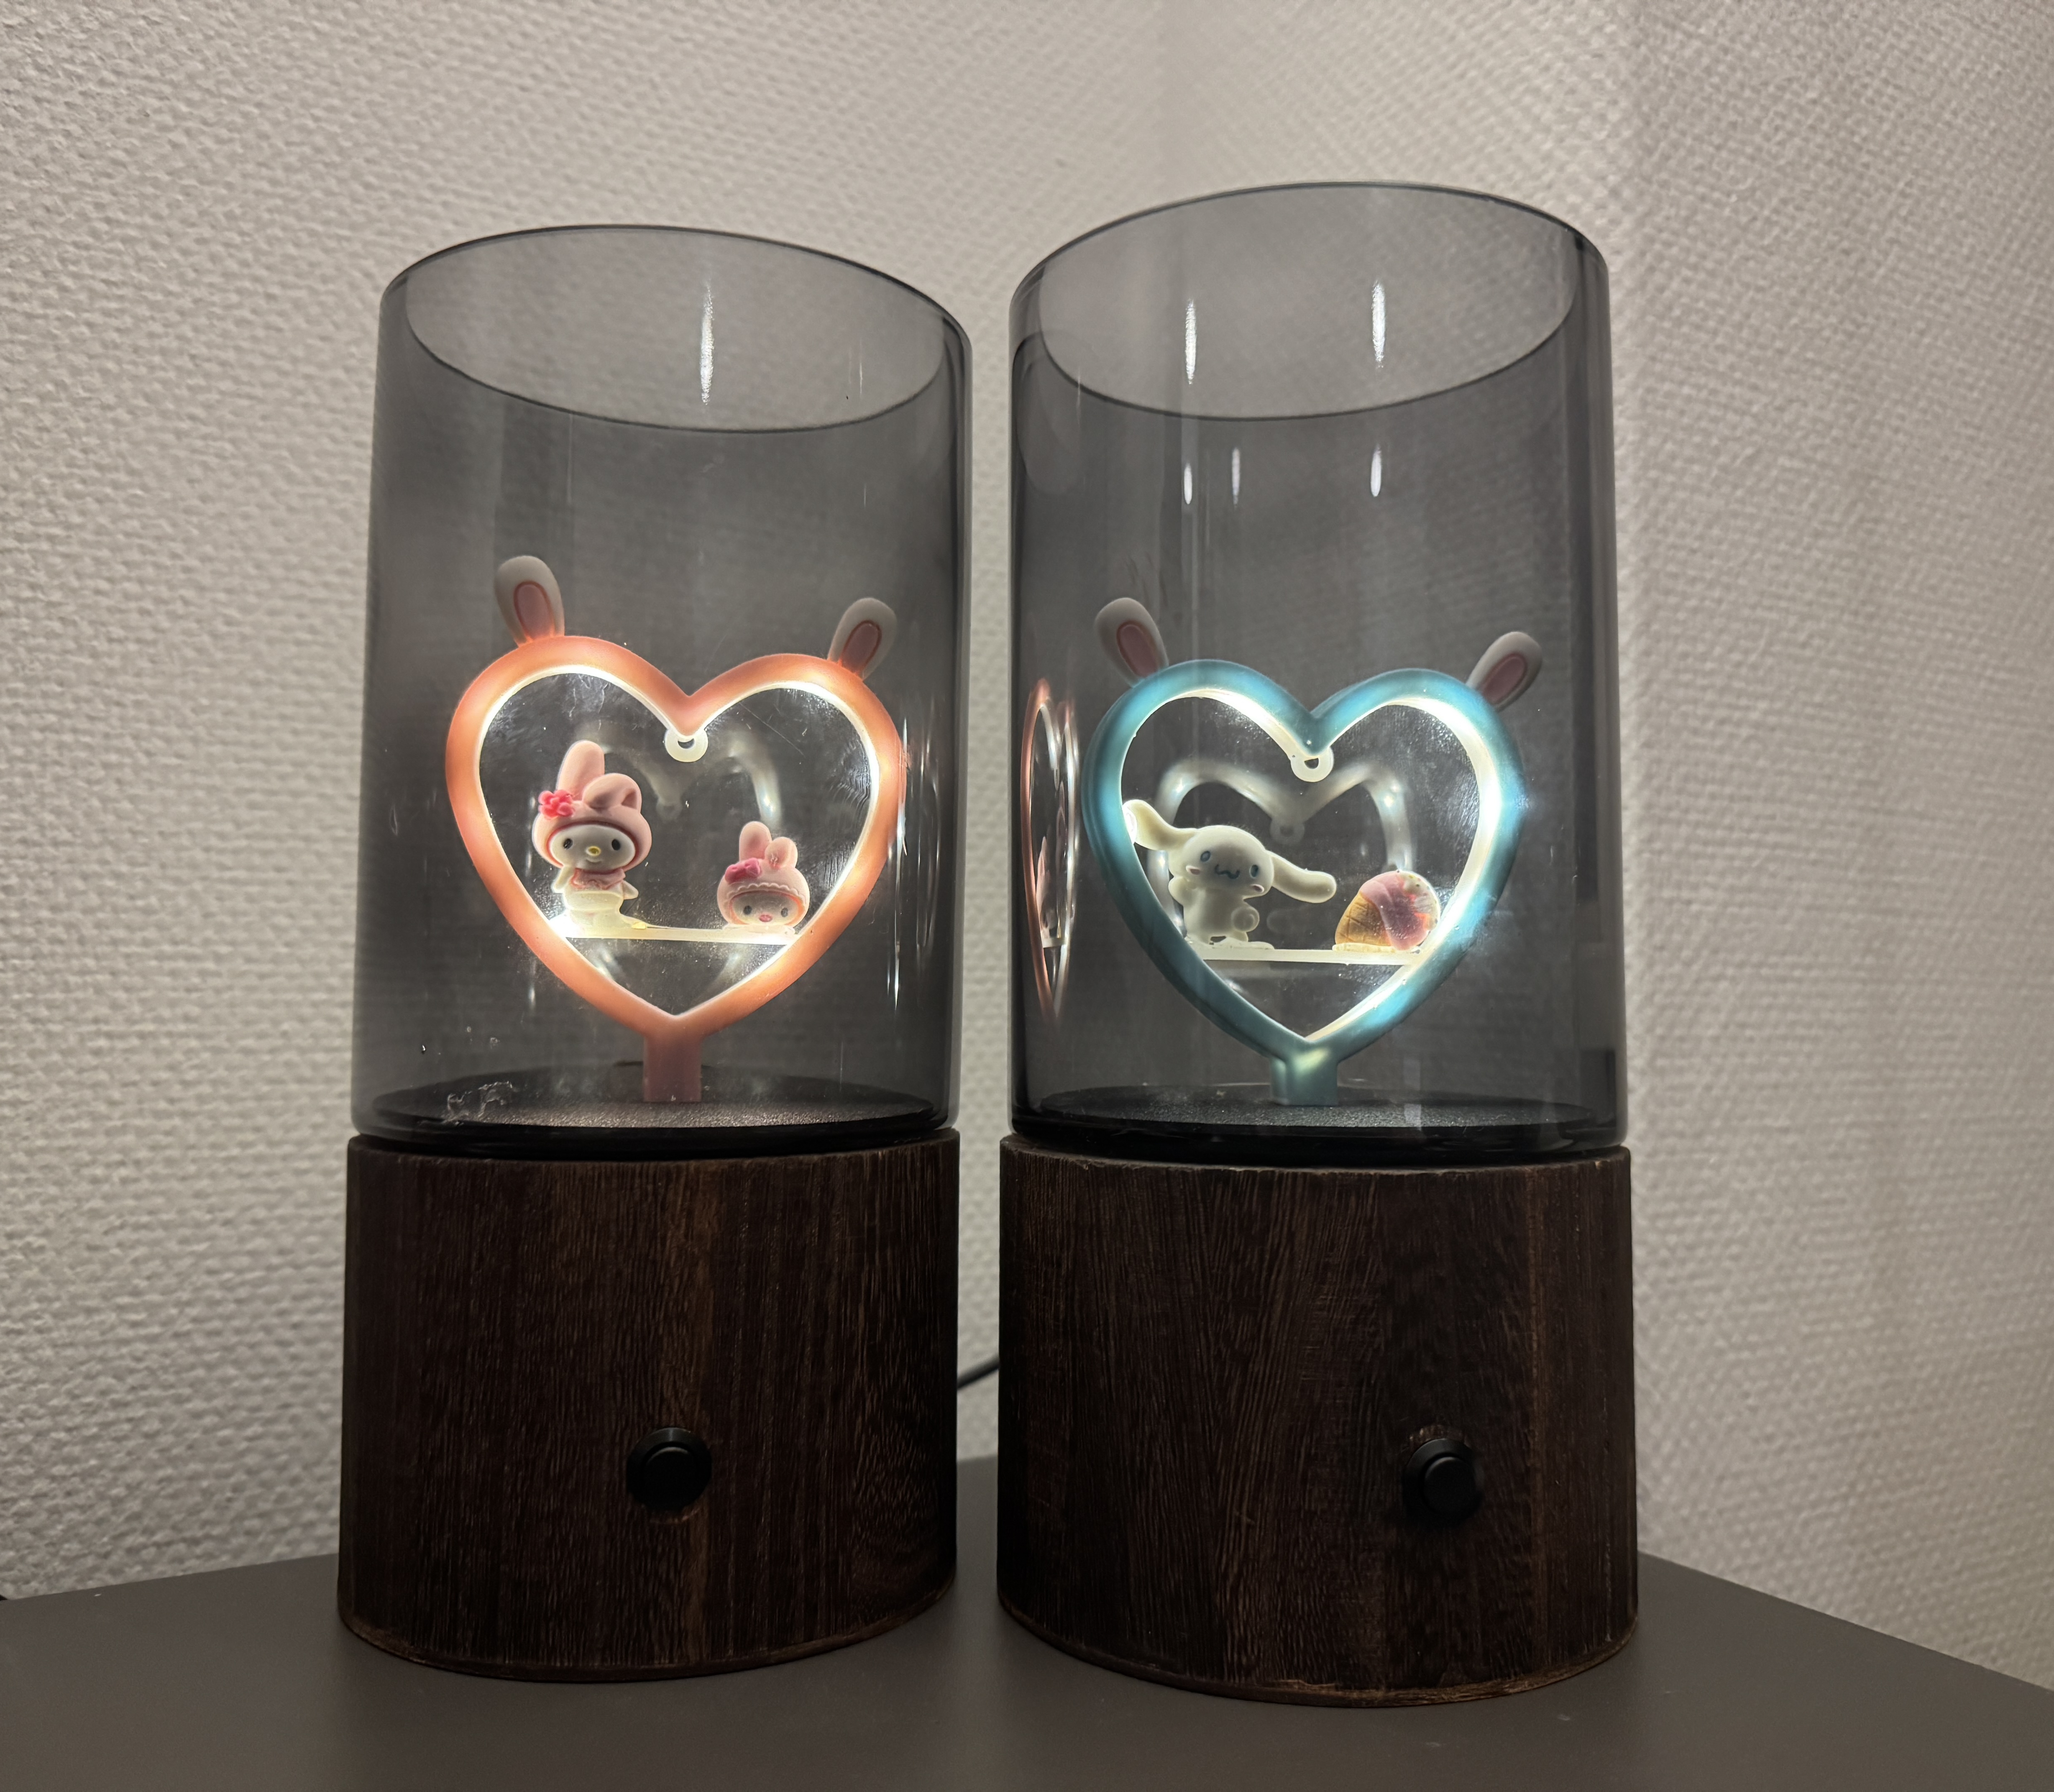
- Two vases: Wooden bases with glass tops.
- Two heart-shaped Hello Kitty lights: Themed for that extra charm.
- Two ESP32 microcontrollers: Two ESP32-WROOM-32D's, housed in 3D-printed cases.
- Jumper wires: For connecting the components.
- Two momentary push buttons: For toggling the lights manually.
- 3D-printed components: Custom bases for the lights to sit within the glass.
- Web application: Built with Next.js and hosted on Vercel for remote control.
Not all of these materials are essential of course. You don't have to use Hello Kitty lights or the specific vases I chose. The core idea is to have two lights that can communicate with each other and be controlled remotely.
Tools Used
- 3D printer: For creating custom bases and cases.
- Soldering iron: To connect the wires securely.
- Arduino IDE: For programming the ESP32s.
- MQTT Broker: To handle messaging between the devices (I won't go into detail on this, but I will link to resources for setting it up).
- Next.js: For developing the web application.
- Vercel: For hosting the web application.
- Heat gun: For heat-shrinking the wires.
- Wire strippers: For preparing the wires.
- Screwdriver: For dis-assembling some components.
The concept
The idea was to have two separate lights that are interconnected. When you press the button on one, it not only turns off that light but also sends a signal to turn off the other light. This symbolizes the connection between two people—actions in one place affect the other. Additionally, I wanted the ability to control the lights remotely, so I built a web application that interfaces with the MQTT broker.
Building the hardware
Assembling the lights
- Preparing the Vases: The wooden bases provided a sturdy foundation, while the glass tops added an elegant touch.
- 3D Printing the Bases: I designed and printed custom bases for the Hello Kitty lights to sit securely inside the glass.
- Housing the ESP32s: Using a 3D printer, I created cases to encase the ESP32 microcontrollers, protecting them and keeping the setup clean.
- Wiring the Components:
- Connected the ESP32s to the Hello Kitty lights.
- Integrated the momentary push buttons for manual control.
- Ensured all wiring was neatly organized within the vase bases.
Setting up the MQTT Broker
I used an Eclipse MQTT broker to handle the messaging between the two ESP32 devices and the web application.
- Installing Eclipse MQTT: Set up the broker to listen for messages on specific topics.
- Configuring Topics: Created the topic
home/lights/togglefor communication. - Testing the Broker: Used MQTT client tools to ensure messages were correctly sent and received.
For testing purposes, you can use public MQTT brokers like HiveMQ. However, for a production setup, it's recommended to host your own broker for better security and control. I achieved this by setting up Eclipse Mosquitto running in a kubernetes cluster on my Truenas SCALE server.
Coding the ESP32s
- Setup: Initializes the pins and sets up Wi-Fi and MQTT connections.
- Loop: Checks for button presses to toggle the light and publishes the new state to the MQTT topic.
- Callback: Receives messages from the MQTT broker and updates the light state accordingly.
I also setup security measures like TLS encryption for the MQTT connection to ensure data privacy. The full code for the ESP32 can be found in the GitHub repository linked at the end of this post.
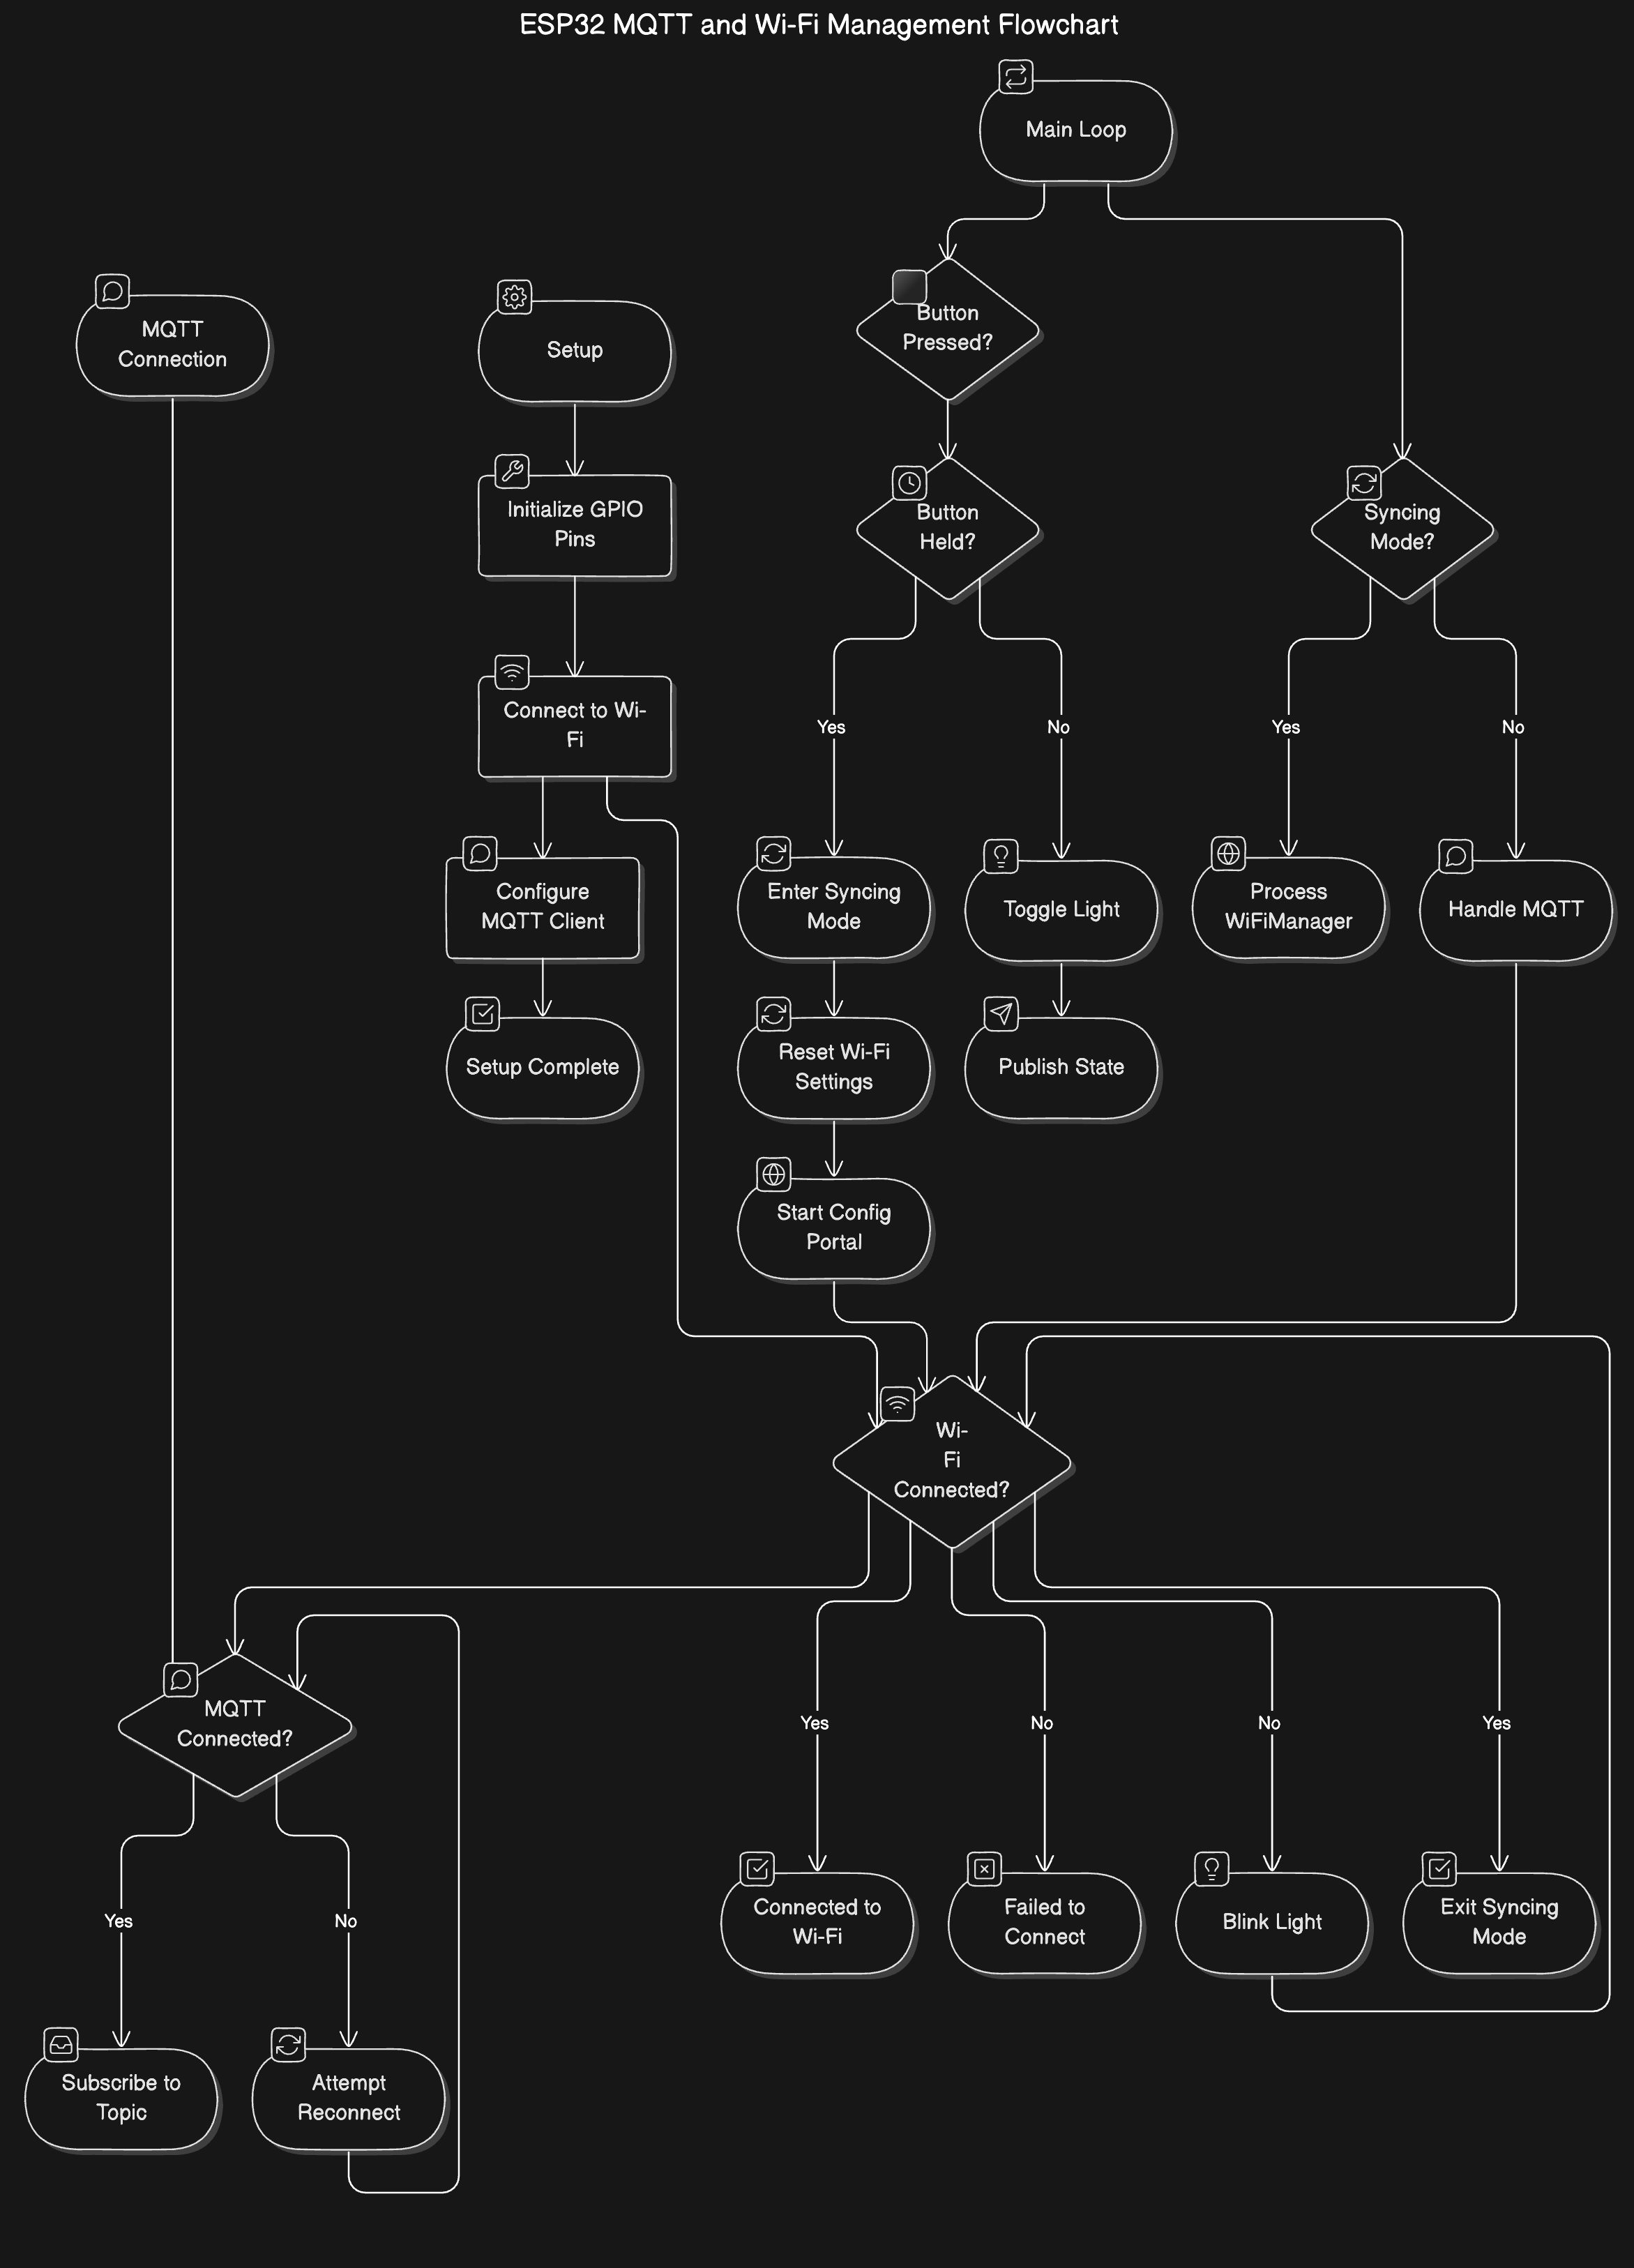
Flowchart
Here's a simplified flowchart to visualize the communication between the ESP32s, the MQTT broker, and the web application:

Developing the webapp
I wanted a user-friendly interface to control the lights remotely, so I built a web application using Next.js and hosted it on Vercel.
Features
- Real-Time Control: Toggle the lights on or off.
- Status Display: Shows the current state of each light.
- Responsive Design: Accessible from both desktop and mobile devices.
Conclusion
This project made out of love, combining technology and adding a personal touch. If you're looking to create something similar, I hope this guide provides a helpful starting point. Feel free to reach out with any questions or share your own creations!